
호비시의 끄적끄적
Spring Redis ElastiCache 연동하기 본문
우선 AWS ElastiCache를 만들어 줍시다.
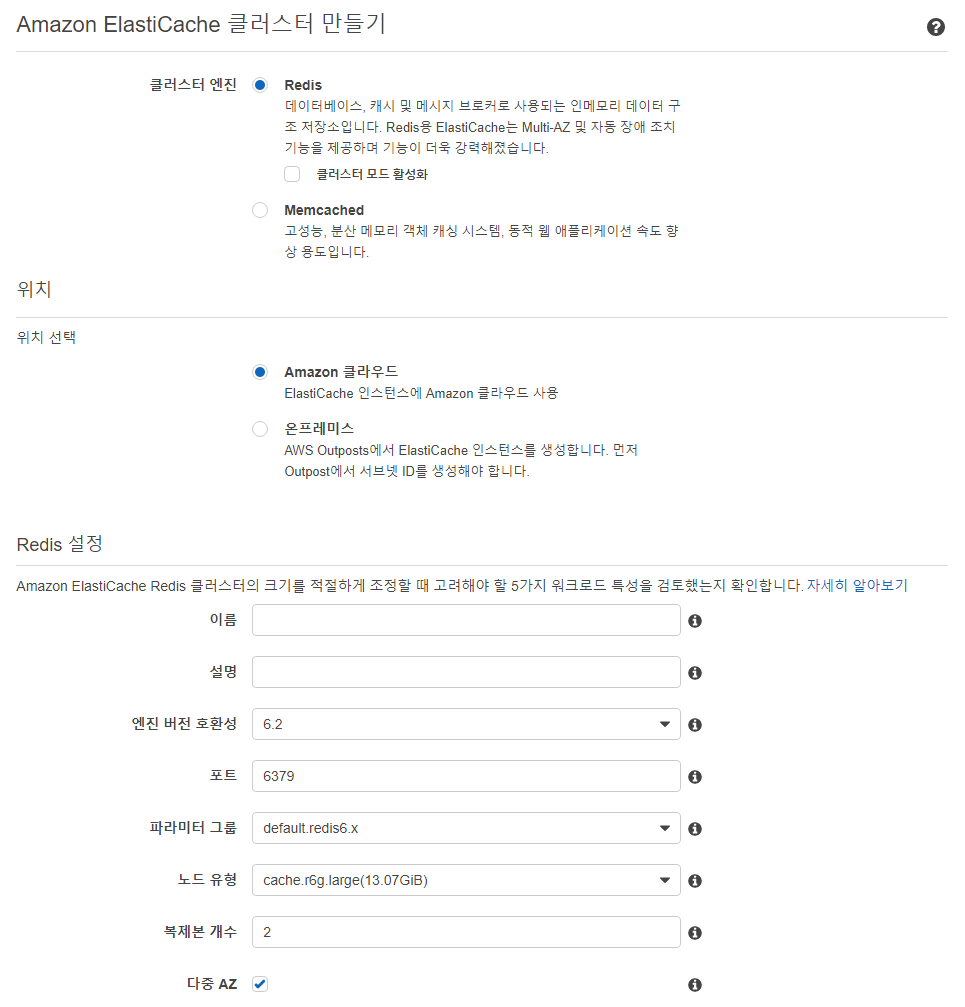
생성을 누르면 나오는 기본 설정입니다. 노드 유형을 알맞게 설정해주세요.
Redis는 in Memory Cache 이기에 메모리 크기가 큰것이 좋지만 저는 test 겸 작은걸 선택하겠습니다.

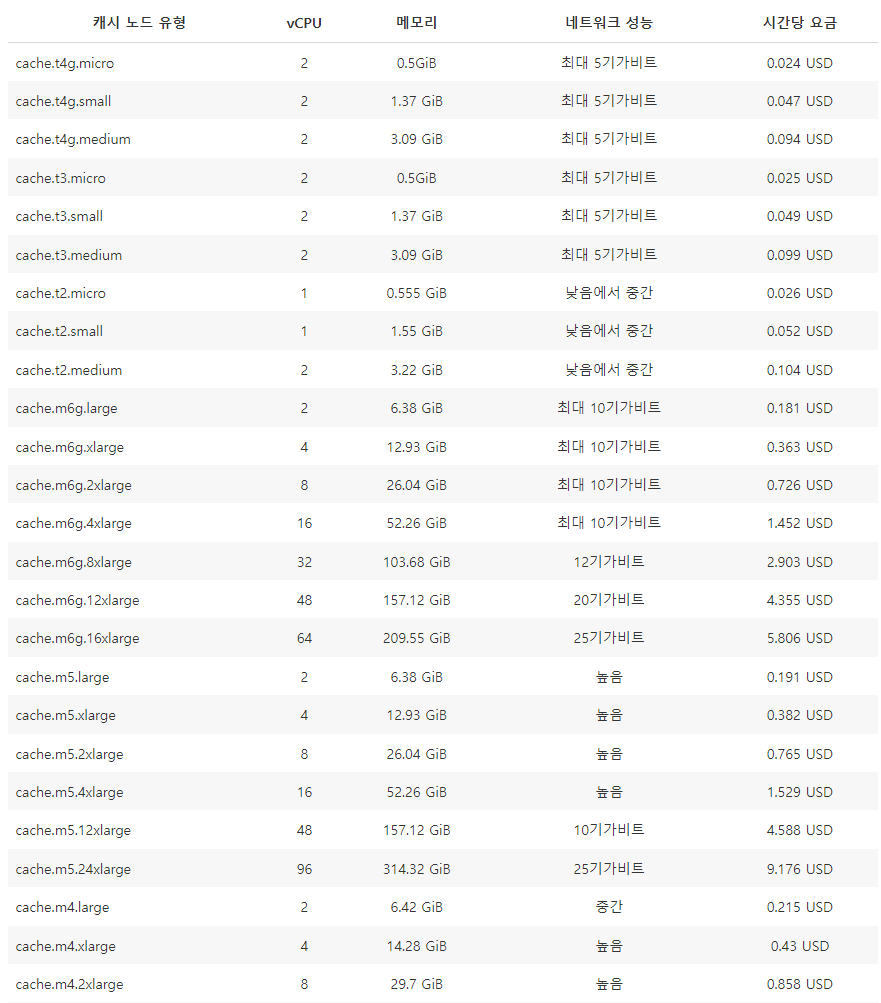
https://aws.amazon.com/ko/elasticache/pricing/
[관리형 캐싱 서비스 요금 - Amazon ElastiCache 요금 - Amazon Web Services
aws.amazon.com](https://aws.amazon.com/ko/elasticache/pricing/)
캐시 노드 유형에 따른 요금입니다. 잘 선택해주세요
고급 Redis 설정에서 서브넷을 새로 생성해주고 가용영역도 배치해줍니다.
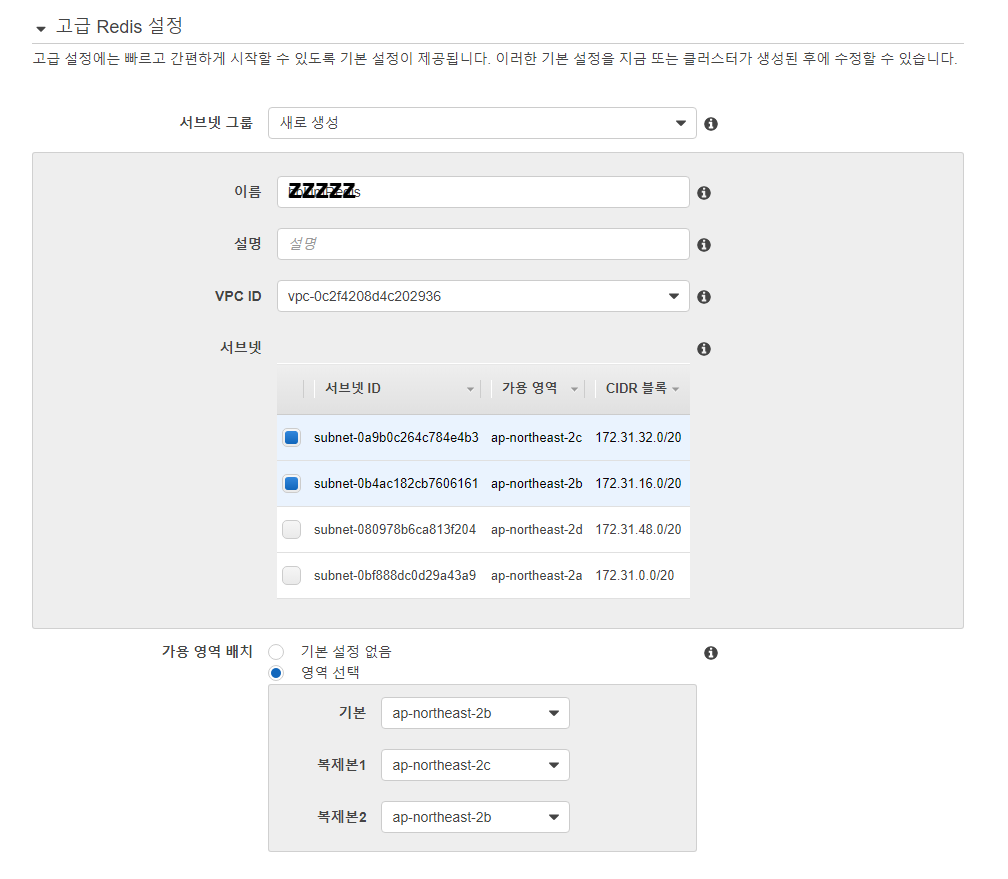
나머지 옵션들은 아무것도 수정하지 않았습니다.
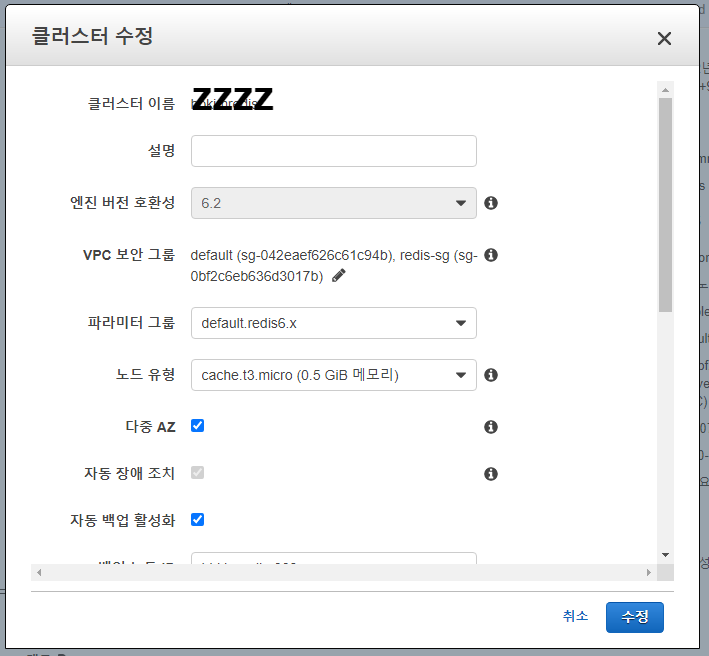
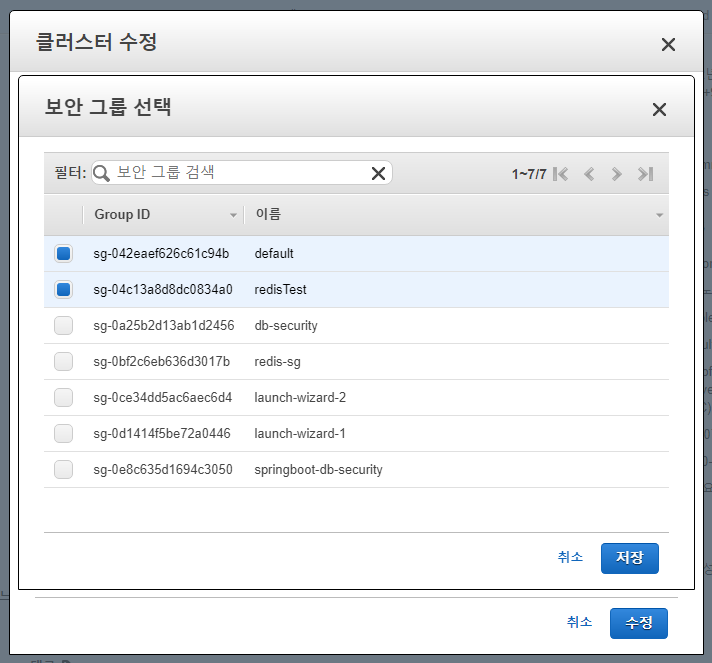
Redis를 만든 후 6379 포트가 열린 EC2 보안그룹을 만들어주세요

만들어놓은 Redis의 보안그룹을 수정하겠습니다.

EC2를 만드는 것은 생략하겠습니다.
만든 EC2에 접속하고 필수 요소들을 설치해 줍시다.
기본 엔드포인트에서 포트번호를 제외하고 넣어주세요
sudo apt-get update
sudp apt-get install openjdk-8-jdk
sudo apt install gcc
sudo apt install make
wget http://download.redis.io/redis-stable.tar.gz
tar xvzf redis-stable.tar.gz
cd redis-stable
make distclean      # ubuntu systems only
make
sudo cp src/redis-cli /usr/bin
redis-cli -c -h [redis 기본 엔드포인트]
모든 명령어가 에러없이 실행됐다면 다음과 같은 명령 프롬프트가 나타납니다.
[redis 기본 엔드포인트]:6379>
Spring 에서 Redis를 테스트 할 수있는 기본적인 코드를 작성해보겠습니다.
build.gradle 의존성 주입
dependencies {
    implementation 'org.springframework.boot:spring-boot-starter-web'
    compileOnly 'org.projectlombok:lombok'
    annotationProcessor 'org.projectlombok:lombok'
    testImplementation 'org.springframework.boot:spring-boot-starter-test'
    //redis 추가
    implementation 'org.springframework.boot:spring-boot-starter-data-redis'
}
application.yml
spring:
  redis:
    host: [redis 기본 엔드포인트]
    port: 6379
RedisConfig
@Configuration
public class RedisConfig {

    @Value("${spring.redis.host}")
    private String redisHost;

    @Value("${spring.redis.port}")
    private int redisPort;

    @Bean
    public RedisConnectionFactory redisConnectionFactory() {
        LettuceConnectionFactory lettuceConnectionFactory = new LettuceConnectionFactory(redisHost, redisPort);
        return lettuceConnectionFactory;
    }

    @Bean
    public RedisTemplate<String, Object> redisTemplate() {
        RedisTemplate<String, Object> redisTemplate = new RedisTemplate<>();
        redisTemplate.setConnectionFactory(redisConnectionFactory());
        redisTemplate.setKeySerializer(new StringRedisSerializer());
        return redisTemplate;
    }
}
RedisController
@RequiredArgsConstructor
@RestController
public class RedisController {

    @Autowired
    private final RedisService redisService;

    @GetMapping("/")
    public String test() {
        redisService.redisString();
        return "test";
    }
}
RedisService
@Slf4j
@RequiredArgsConstructor
@Service
public class RedisService {

    private final RedisTemplate<String, Object> redisTemplate;

    public void redisString() {
        ValueOperations<String, Object> operations = redisTemplate.opsForValue();
        operations.set("test", "test");
        String redis = (String)operations.get("test");
        log.info(redis);
    }
}
redis test page

8080 포트로 접속해서 test가 찍히는 것을 확인
EC2에서 redis에 접속하여 key 값을 찍어보면 나오는 것을 확인할 수 있다.

출처
https://devlog-wjdrbs96.tistory.com/314
[AWS] Spring Boot로 ElastiCache 간단한 실습해보기
AWS ElastiCache 시작하기 이번 글에서는 AWS ElastiCache 를 생성하고 아주 간단한 실습을 하는 것을 정리해보겠습니다. 이번 실습에서는 Redis 를 사용해서 할 것이기 때문에 Redis 를 체크하겠습니다. 위
devlog-wjdrbs96.tistory.com
https://docs.aws.amazon.com/ko_kr/AmazonElastiCache/latest/red-ug/nodes-connecting.html
노드에 연결 - Amazon ElastiCache for Redis
이 페이지에 작업이 필요하다는 점을 알려 주셔서 감사합니다. 실망시켜 드려 죄송합니다. 잠깐 시간을 내어 설명서를 향상시킬 수 있는 방법에 대해 말씀해 주십시오.
docs.aws.amazon.com
'Back > Spring' 카테고리의 다른 글
| Spring Framework 와 Spring Boot 의 차이 (0) | 2022.06.10 |
|---|---|
| JPA는 무엇인가? (0) | 2022.06.09 |
| 스프링 빈을 등록하는 2가지 방법 (0) | 2022.04.06 |
| DI, IoC, Bean (0) | 2022.04.05 |
| 테스트 종류별 특징 (0) | 2022.03.25 |


